Contents
Introduction
Author: Movania Muhammad Mobeen
Hello readers,
In this article, we will learn how to port the 3rd tutorial on texture mapping to the new OpenGL 3.3. specs. Ok let's have a look at tutorial 3. In this tutorial, we see a rotating cube with a texture map applied to it. We are interested in how to handle the textue mapping in OpenGL 3.3 and above. The tutorial 3 tells us how to load a bitmap. In OpenGL versions prior to OpenGL 3.0, we need to explicitly enable the texturing with a call to glEnable like this:
glEnable(GL_TEXTURE_2D);
Now in the OpenGL 3.3 core profile, this call is not needed. In a modern core profile, there is no "fixed-function pipeline" (i.e. built-in shader generator). The glEnable( GL_TEXTURE_2D) function is a directive to the fixed-function pipeline's shader generator that you want to include code to support that texture unit. With shaders, you decide directly which texture units you're going to reference by giving a call to glActiveTexture to activate the right texture unit. For our case, since we have a single texture, we use the default texture unit i.e. texture unit 0 (GL_TEXTURE0). Following this call, we call glBindTexture to bind our texture to the currently active texture unit. The texture remains bound to the active texture unit until another call to glBindTexture is made. To unbind a texture from the texture target, we bind 0 as follows:
glBindTexture(GL_TEXTURE_2D,0);
The code first issues a call to the LoadBitmap function. The handling of data and texture parameters is the same as in the fixed funcion pipeline code:
glBindTexture(GL_TEXTURE_2D, num_texture); // Bind the ID texture specified by the 2nd parameter

// The next commands sets the texture parameters
glTexParameterf(GL_TEXTURE_2D, GL_TEXTURE_WRAP_S, GL_REPEAT);
glTexParameterf(GL_TEXTURE_2D, GL_TEXTURE_WRAP_T, GL_REPEAT);
glTexParameterf(GL_TEXTURE_2D, GL_TEXTURE_MAG_FILTER, GL_LINEAR);
glTexParameterf(GL_TEXTURE_2D, GL_TEXTURE_MIN_FILTER, GL_LINEAR_MIPMAP_NEAREST);
There are some subtle changes that we must highlight. First, the core profile has removed texture environment modes (glTexEnv) altogether. This function allows us to modulate the colors of the texture with those colors that the polygon would have without texture mapping. With shaders, we decide the combination of colors ourself. We can perform any combination operation we like in the fragment shader with a greater control which makes glTexEnv call useless. Next, we issue a call to the glTexImage2D function:
glTexImage2D(GL_TEXTURE_2D, 0, GL_RGBA, infoheader.biWidth, infoheader.biHeight, 0, GL_RGBA, GL_UNSIGNED_BYTE, l_texture);
This function allocates the memory for the texture in memory. The first parameter is the texture target, the second parameter is the mipmap level being loaded (0 is the base level). The third parameter is the internal format which we assign as GL_RGBA. The next two parameters are the width and height of our texture. Next parameter is the width of border for the texture this enables us to extend the width or height of our texture by an extra set of texels at the borders. Next parameter is the format of our data i.e. the internal layout of the data elements given in the final parameter. Next is the type of our data element. Final parameter is the array of values containing the data elements. The OpenGL 3.3 core profile has also deprecated the gluBuild2DMipmaps function. This call is replaced with:
glGenerateMipmap(GL_TEXTURE_2D);
The parameters to control the total number of mipmaps levels are given by:
glTexParameteri(GL_TEXTURE_2D, GL_TEXTURE_BASE_LEVEL, 0);
glTexParameteri(GL_TEXTURE_2D, GL_TEXTURE_MAX_LEVEL, 4);
That's it for the texture parameter handling. Now we talk about how we use shaders to put texture map on our geometry.
Texture mapping using shaders in OpenGL 3.3
Geometry handling
We have loaded the image successfully and the texture id is stored in the cube.id_texture variable. Like the previous tutorial, we need to create a new vbo to store the uv texture coordinates. We have already extended our cube client side array as follows,
obj_type cube =
{
    {
        -10, -10, 10,   // vertex v0
        10,  -10, 10,   // vertex v1
        10,  -10, -10,  // vertex v2
        -10, -10, -10,  // vertex v3
        -10, 10,  10,   // vertex v4
        10,  10,  10,   // vertex v5
        10,  10,  -10,  // vertex v6
        -10, 10,  -10   // vertex v7
    },
    {
        0, 1, 4,  // polygon v0,v1,v4
        4, 1, 5,  // polygon v1,v5,v4
        1, 2, 5,  // polygon v1,v2,v5
        2, 6, 5,  // polygon v2,v6,v5
        2, 3, 6,  // polygon v2,v3,v6
        3, 7, 6,  // polygon v3,v7,v6
        3, 0, 7,  // polygon v3,v0,v7
        0, 4, 7,  // polygon v0,v4,v7
        4, 5, 7,  // polygon v4,v5,v7
        5, 6, 7,  // polygon v5,v6,v7
        3, 2, 0,  // polygon v3,v2,v0
        2, 1, 0,  // polygon v2,v1,v0
    },
    {
        0.0, 0.0,  // mapping coordinates for vertex v0
        1.0, 0.0,  // mapping coordinates for vertex v1
        1.0, 0.0,  // mapping coordinates for vertex v2
        0.0, 0.0,  // mapping coordinates for vertex v3
        0.0, 1.0,  // mapping coordinates for vertex v4
        1.0, 1.0,  // mapping coordinates for vertex v5
        1.0, 1.0,  // mapping coordinates for vertex v6
        0.0, 1.0   // mapping coordinates for vertex v7
    },
    0,
};
We create a new variable vboTexCoordID to store the new array buffer object for uv coordinates. The InitVAO function is extended with the following lines:
glBindBuffer (GL_ARRAY_BUFFER, vboTexCoordID);
glBufferData (GL_ARRAY_BUFFER, sizeof(cube.mapcoord), &cube.mapcoord[0], GL_STATIC_DRAW);
These lines bind our uv coordinate vbo to the current array buffer binding of the VAO. Next we push our data to the buffer object using glBufferData. This call is identical to the previous calls we have made in the last tutorials. Following this call, we enable our vertex attribute vUV to attach it to our vertex shader attribute. Finally, we call the glVertexAttrbPointer function to let OpenGL know that type of our data and the offset of the next item:
glEnableVertexAttribArray(shader["vUV"]);
glVertexAttribPointer (shader["vUV"], 2, GL_FLOAT, GL_FALSE,sizeof(GLfloat)*2,0);
Render handling
With OpenGL 3.0 and above, the user has to provide matrix handling by himself which is trivial. All we need is a library that supports matrix functions like matrix multipliation and matrix inverse etc. We can write these functions by ourselves however, the quality of code and the accuracy might not be sufficient. So a better approach is to use an already existing library. One such library is glm and another reference implementation is also provided by this site (spacesimulator.net). In a later tutorial (tutorial 6 and above) we use both of these libraries together. OK so in the rendering function, we calculate our modelview matrix. We have already calculated our projection matrix in the resize handler. This function is exactly like the gluPerspective function in the original tutorial. While previously we issued calls to glTranslatef, glRotatef etc. functions, they are replaced by calls to glm::translate glm::rotate etc. functions as shown below:
//setup matrices
glm::mat4 T = glm::translate(glm::mat4(1.0f),glm::vec3(0.0f, 0.0f, -50)); //similar to glTranslatef(0,0,-50);
glm::mat4 Rx = glm::rotate(T,  rotation_x, glm::vec3(1.0f, 0.0f, 0.0f));//similar to glRotatef(Rx,1,0,0);
glm::mat4 Ry	 = glm::rotate(Rx, rotation_y, glm::vec3(0.0f, 1.0f, 0.0f));//similar to glRotatef(Ry,0,1,0);
glm::mat4 MV = glm::rotate(Ry, rotation_z, glm::vec3(0.0f, 0.0f, 1.0f));//similar to glRotatef(Rz,0,0,1);
glm::mat4 MVP = P*MV;
Once we have setup the matrices, we may pass the combined modelview projection matrix to our vertex shader. In order to do this, we must first bind our vao (glBindVertexArray(vaoID)). Then, we must use our shader (shader.Use()). Then we pass our MVP matrix as a shader uniform using the following line of code:
glUniformMatrix4fv(shader("MVP"), 1, GL_FALSE, glm::value_ptr(MVP));
The first parameter is the location of our uniform which we obtain by using the overloaded parenthesis operator. Next is the number of matrices to pass. We only have one matrix to pass so we give this parameter a value of 1. Next parameter is the boolean flag to indicate whether the matrix needs to be transposed. Passing this GL_FALSE tells OpenGL that our matrix is already a column major matrix (as needed by OpenGL) and thus we donot need to transpose it. If for example you are using any other library that stores matrices as row major, you must pass GL_TRUE to this parameter. The final parameter is the pointer to our matrix elements. The function glm::value_ptr returns the float pointer from our matrix. One question arises here. Why do we need to calculate this matrix. Well the combined modelview projection matrix (MVP) brings the coordinates of our object from object space to clip space. Our vertex shader needs this matrix to transform our incoming object space vertex stream into clip space before primitive assembly.
Shader handling
Our vertex and fragment shaders have changed slightly:
#version 330

in vec2 vUV;
in vec4 vVertex;
smooth out vec2 vTexCoord;

uniform mat4 MVP;
void main()
{
   vTexCoord = vUV;
   gl_Position = MVP*vVertex;
}
The vertex shader contains a new vertex attribute vUV which stores our per vertex uv coordinates. We assign it to an output attribute (vTexCoord) in the vertex shader so that it is smoothly interpolated by the rasterizer to the fragment shader stage. We may then sample the texture map using these smooth texture coordinates:
#version 330
smooth in vec2 vTexCoord;
out vec4 vFragColor;

uniform sampler2D textureMap;

void main(void)
{
   vFragColor = texture(textureMap, vTexCoord);
}
The fragment shader gets the smoothly interpolated texture coordinates in the vTexCoord attribute. We have added a uniform variable textureMap in our fragment shader. Think of uniform as a constant object that remains same for each fragment. This stores our texture map that we loaded earlier using the LoadBitmap function. We use the GLSL (texture) function which allows us to sample a texture (textureMap) given a specific sampling point (vTexCoord). Finally, we assign this color to our vFragColor output variable.
Where is the texture connected to the uniform sampler?
A legitimate question to ask here is we just loaded our image and bind it to our texture target (GL_TEXTURE_2D). Next we setup our geometry and assigned the per vertex positions and uv coordinates. Where did we bind the texture to the uniform. In the InitShaders function, we have bound our shader by calling shader.Use(). Next, we have enabled our per vertex attributes vVertex and vUV by issueing a call to:
shader.AddAttribute("vVertex");
shader.AddAttribute("vUV");
Next, we call:
shader.AddUniform("MVP");
shader.AddUniform("textureMap");
These calls only store the locations of our uniform in the GLSLShader class's map so that we may later refer to them directly using the overloaded operator (). This is similar to how we stored the attribute locations in another map and access the attribute location using the [] overloaded operator. Finally, we issue:
glUniform1i(shader("textureMap"),0);
This call is what binds our fragment shader's (textureMap) uniform to the texture we loaded from file. The first parameter of glUniform1i is the location of the uniform. As earlier, we use the overloaded operator() to get the location. The second parameter is the texture unit the texture is bound to. You will say we have not bound any texture. You are wrong. When we loaded our texture in the LoadBitmap function, we bound the texture first and then issued the texture parameter calls. Since we never unbound that texture, it remains bound to the default active texture unit (GL_TEXTURE0). Therefore, we pass 0 to the second parameter of glUniform1i function. Usually a lot of beginners pass the texture id of their texture to this function like this:
glUniform1i(shader("textureMap"),texID);
This is totally wrong. The second parameter is the active texture unit where the texture is bound. Thats it to handle texture mapping in OpenGL 3.3.
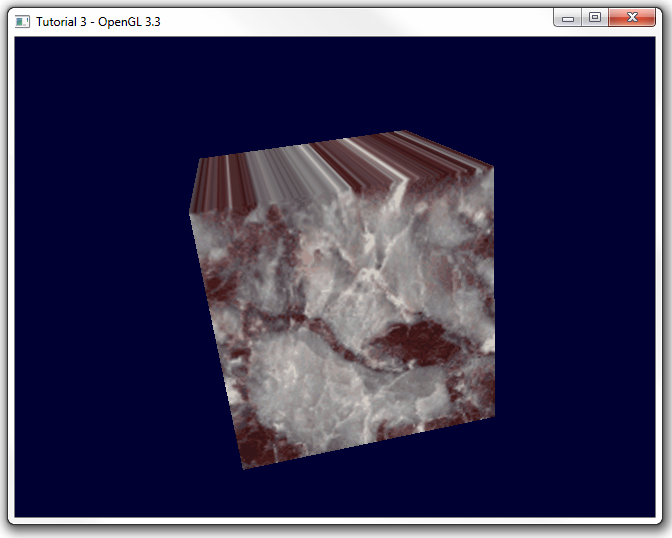
Running the code gives us the following output:
SOURCE CODE
The Source Code of this lesson can be downloaded from the Tutorials Main Page